My Craft Room – 2012
Finally! I got my craft room painted and all back in at least enough to take some photos.
Yet to do is paint my chairs in a consistant color. I’m still debating that one.
Here is a link to the way my craft room looked before I painted.
I went to Lowes, and found the most inexpensive paint they had my Olympic called ‘Fasthide’. I chose from that line, their ‘Linen White’ for the ceiling, and the ‘Vanilla Brandy’ for the walls.
I ‘was’ going to pick a blue, but then I felt that I always change my mind when it comes to color so I didn’t want to be ‘stuck’ with a wall color that didn’t go with a notion I may have in a year to change accent colors! Neutral walls I think are just always best if your someone who likes to play with color too much. Also this color is just warm and that is what I wanted a beach, cottage feel.
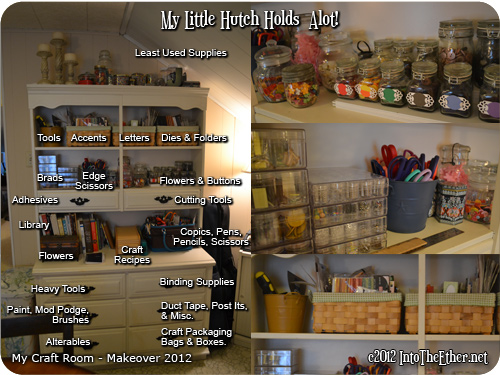
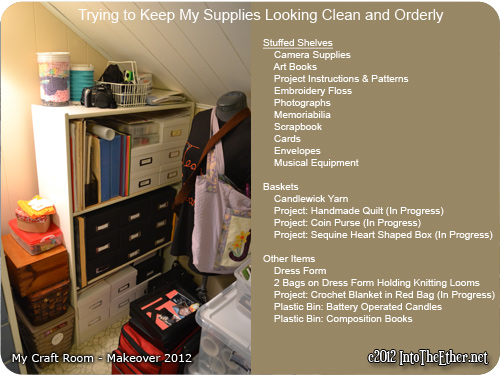
Below is the supply hutch wall. The only wall in this room that ‘thankfully’ fit this hutch. This hutch has been with me since I lived at home.
Here is an overview of just how much my little hutch can hold!
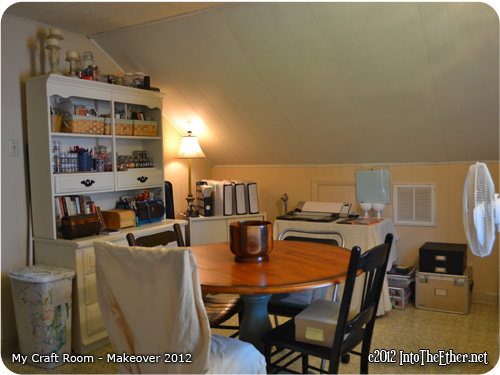
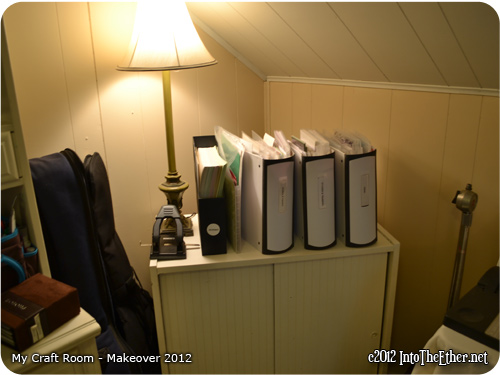
Below is the corner that I decided was just really dark so I decided to put my home video cabinet here hold a lamp. On top are my big binders. Two of them hold my stickers. One whole one just for alphabets. The 3rd one I have my acrylic stamps organized into one. Then I have neatly tucked away my guitars (that I play most-acoustic and electric), and amp, and microphone stand.
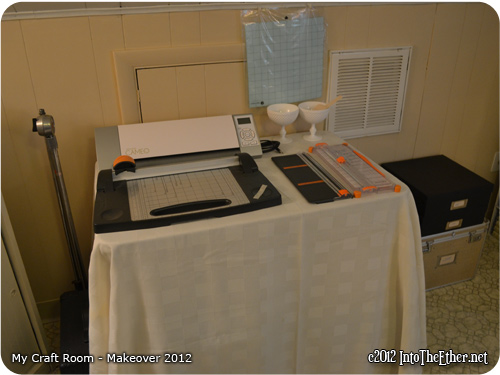
Moving to the right, I decided to put my Silhouette Cameo. This is closer to my scrapbooking supplies and where i’d sit to scrapbook vs. where I did have it which was on my sewing machine table across the room. i think this will be much more convenient. Also my cutters. to the right on the floor, are some boxes I have various collage clippings, mementos to scrapbook, and a box where I put my finished scrapbook pages until I’m ready to put them in a book.
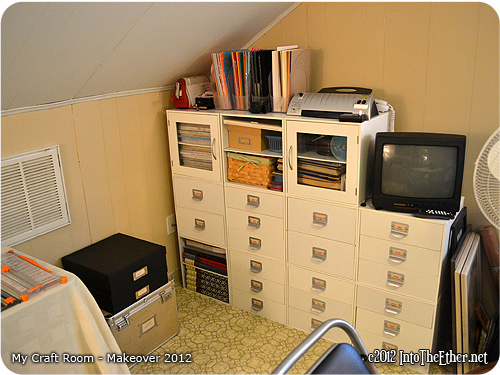
On the other wall, I setup my Jet Max cubes. I’m going to choose a couple pieces of scrapbook paper to put behind the glass doors for extra color and to hide the contents in there.
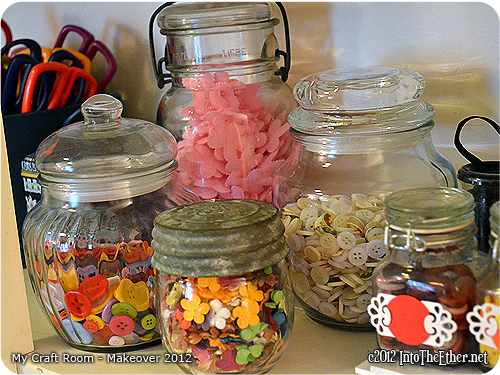
I rearranged all the contents and I was able to fit all of the new rubber stamps I got the other week at a yard sale.
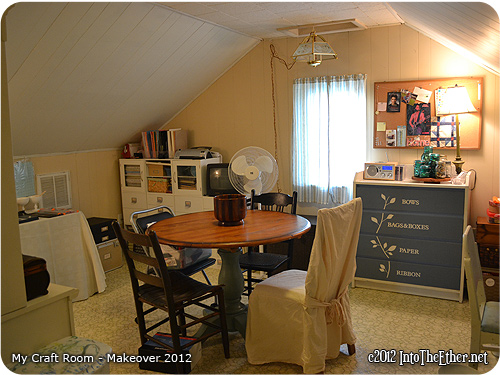
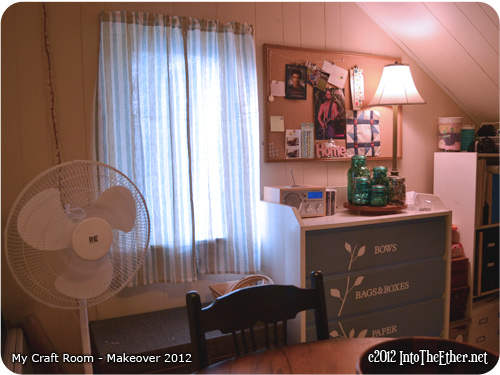
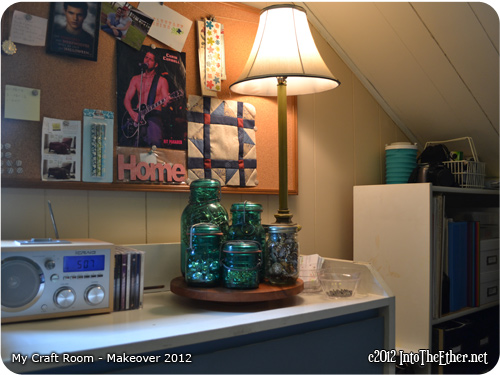
I’ll post later about how I made this curtain from a bargin bin grab for $2.75 from Christmas Tree Shops. Has a beachy feel. couldn’t get a great picture at this angle. Of course there is my idea cork board, the other lamp, I removed my folder holder since I found I never really used it all that much. I decided it was a good place for my clock radio, extra mason jars I’ve been collecting to put my supplies in. There of course is also my dresser that I decorated of gift wrapping supplies and ribbon.
In this corner, I have started projects and various other supplies as neat as I possibly could make them. Some of these items will be removed at some point as I finish those projects. It’s actually ‘finishing’ those projects that i’ll be able to get too now that i’m done my craft room redesign.
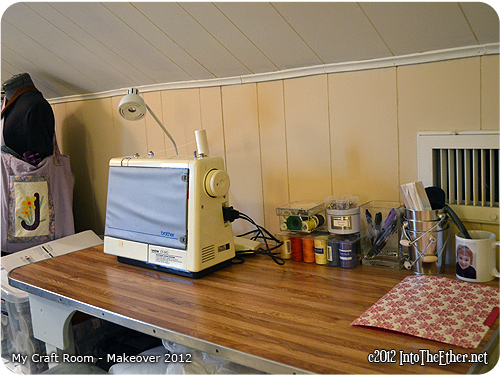
I’m glad that I was able to make my dress form shorter (didn’t know this when I found it at a yard sale) to actually fit on the wall beside my sewing machine vs. being across the room before.
Also, This table (yep…another yard sale find) I HAD before but I covered with blue contact paper. It was bubbling up and coming off, so figuring i’d just get new as I pulled it off it revealed this great looking wood. Why the heck did I cover it up! I saw a few black marks and such, but a little elbow grease and a magic eraser later, and it was all cleaned up!
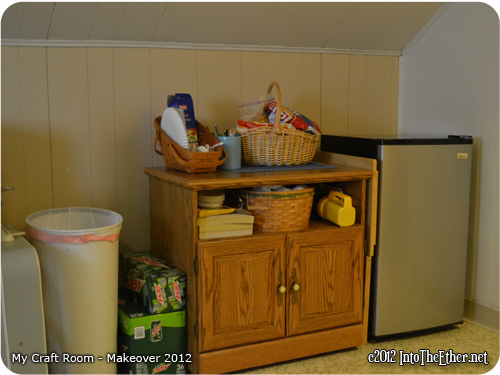
Oh…and I never got rid of the snack corner! Less trips to the kitchen the better!
All in all, I think I’m truly set for a while. My room with those grey paneled walls, just wasn’t ‘comfortable’ to sit in to do crafts. Now that it just looks cleaner, makes me want to sit in there for hours (when I can) to work on my projects.
I know where everything is.
So I believe that will allow quicker projects to be created, and make their way quicker to my blog for sharing!